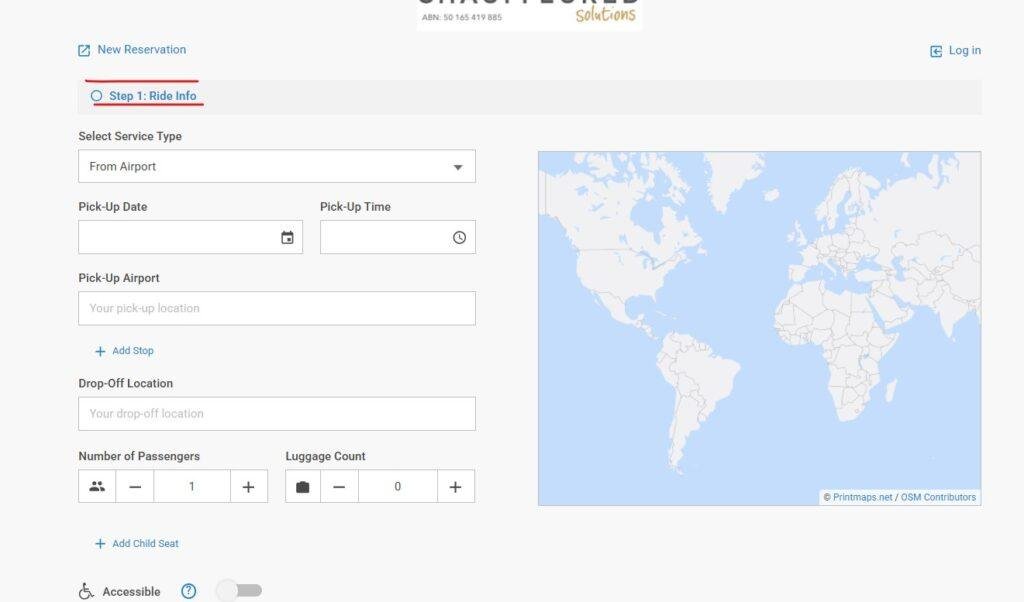
Select which kind of service you require

You have 3 options: “From Airport” if you require an Airport Pick-Up “To Airport” if you require a Drop-Off to the Airport “Point to Point” if you require a driven chauffeured service within the city. If you require any additional stop, you will be able to add it at next step.

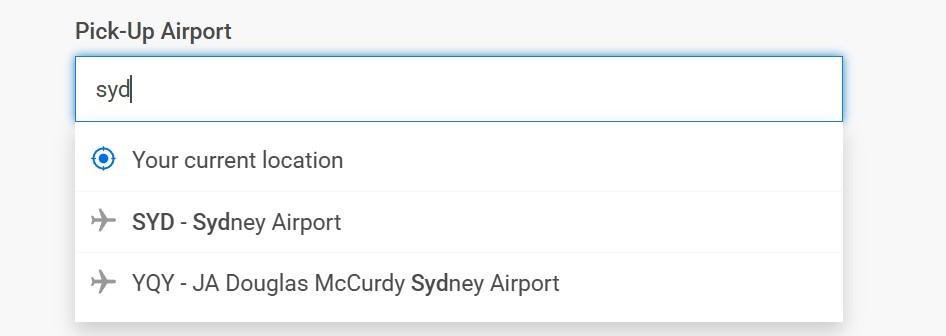
For Standard Location field you have to start typing your desired location until you will find it on instant results. You can type Point of Interest, Street name, Hotel name, etc. When your location comes up you have to click on it in order to select it.
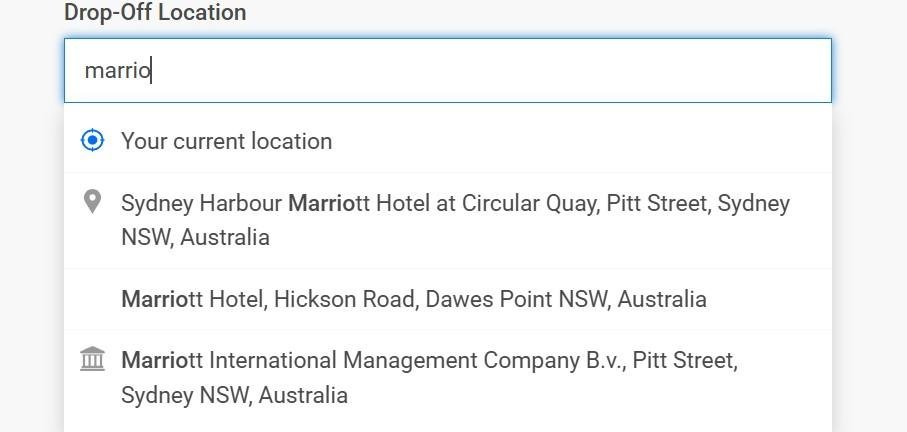
You can even select one of the Saved location by clicking on the Star Icon on the right side of the Standard Location field. Once you select your Pick-Up and Drop-Off locations you can select how many passengers are you booking your ride for.
On the next screen you can Review your trip and add some Extra Stops if required. Extra Stops are Standard Location based (Instant Search including Street addresses, Hotel names and Point of Interest), you can add as many Extra Stop as you like.

Next step is to choose which kind of vehicle you prefer to book in. You can choose between Australia Luxury sedans, European Luxury sedans or Luxury People Movers.

Here you have to add at least 1 passenger information (Name, Email, Phone) in order to allow our driver to get in touch with them if required. Here you can select one of the Saved Passenger for a fast filling. If you need to provide extra informations or details you will find a dedicated text area as well.


Now you are all set. Click on BOOK NOW and your New Reservation will be submitted. You will be able to follow-up and Review this Reservation within your Dashboard – Rides Management.
After clicking Rides from the Main menu you will see the list of rides connected to your company account, from the most recent (or upcoming) to the oldest.
If you have one or more upcoming rides you will be able to view details, edit or even cancel a reservation.
If you need to access to Completed Rides, you can scroll the list or filter your rides using the designed tool at the top of the page, where you can filter by Upcoming Rides or Completed Rides and filter by Date range.
For each Completed Ride you can view details, download PDF or view a Print version on screen.
There are 3 different type of user available in our system: Passenger, Billing Contact and Booking Contact.
Each user’s type has different role:
For Accounts where multiple Billing Contacts exist and one or more Booking Contacts that books for them, a single Billing Contact needs to be created that all the other Billing contacts are tied to. See the below example for a visual representation.
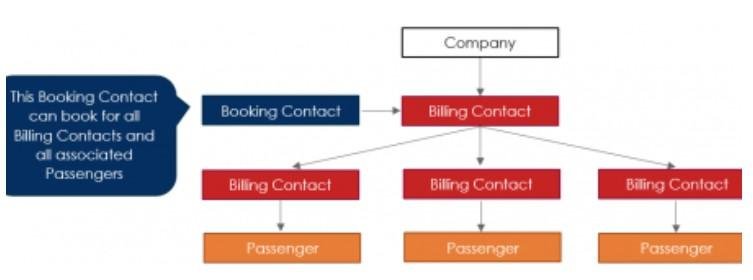
If each Billing Contact was to have one or more dedicated Booking Contacts, the structure would likely be similar to the below visual representation.
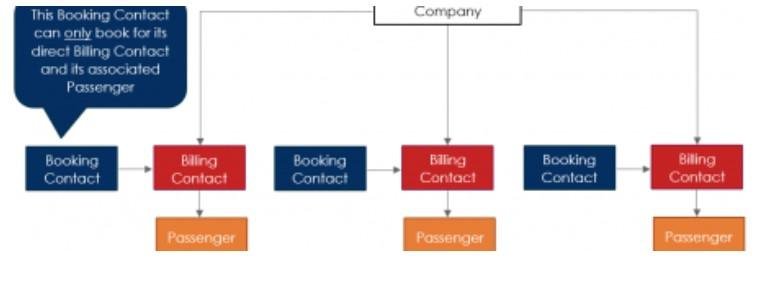
Here are some examples of other typical account set ups.
Billing Contact with Multiple Passengers
ABC Company has several persons that travel as consultants frequently but all the bills go to the company for payment. In this case the person who pays the bill is set up as the Billing Contact, and each person that travels is a Passenger only linked to the ABC Company Billing Contact. Trips will be grouped under the Billing Contact, invoiced and the bill paid by the Billing Contact. The Billing Contact Payment method would be set to Direct Bill/Invoice.
Company with Multiple Billing Contacts/Passengers
XYZ Company has 20 people that travel, and four people that manage the billing for 5 travelers each that are billed on a monthly basis. In this case each of the four persons that pay bills would need to be a Billing Contact, and the 5 people they manage would need to be Passengers linked to the appropriate Billing Contact. The Payment Method for each Billing Contact is set to Direct Bill/Invoice. Each Billing Contact would receive a separate invoice for the travel by their passengers at the end of the month.
Customers who Pay Their Own Bill
Customers who both travel with you and pay their own bill need to be set up as a Billing Contact and Passenger. The Payment Method on the account would be set to Direct/Bill Invoice if you were going to invoice the customer periodically; or to another Payment Method (ie Credit Card) if the customer is going to pay for each ride as it occurs.
If you have frequent Drop-off or Pick-up locations you can save it as a Favorite. A Stored Location can be chosen every time you need to fill a Standard Location field. To manage Stored Location you have to click top left main menu button and scroll down to Stored Locations
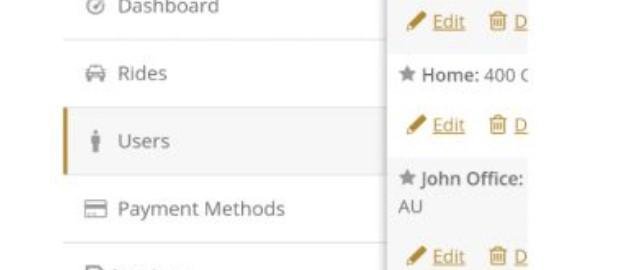
For each Stored Location you can choose a street address, hotel name, business name or any Point of Interest. For each Stored Location you can assign a Label or “Address Type”. There are 3 different label: Home, Work and Other.
You can setup 1 Home, 1 Work and unlimited Other labels. When you select “Other” as a label you can give a name to it for your convenience.
Our invoicing system allows you or your company to pay for multiple trips at one time or have a running tab for your rides.
To manage your invoices you can go to Main menu (3 bar on top left) an click on “Invoices“.
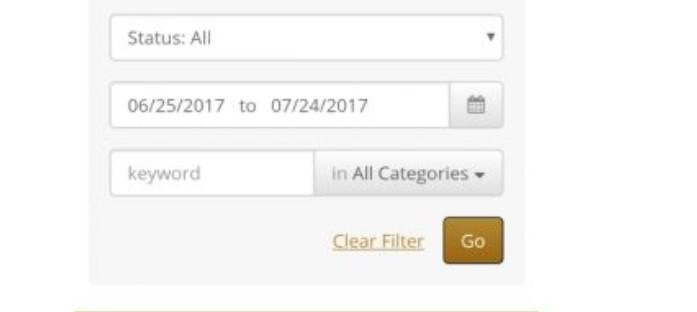
You can filter Invoices by:
You can select each invoice and see all details. You can download PDF or show a print version on screen.

Copyright © Chauffeured Solutions AUS Pty Ltd | Tech Solution: S-Tech Solutions